# Dubbo源码解析:基于XML配置原理解析

# 步骤
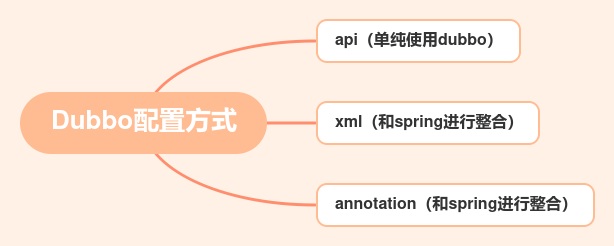 在Dubbo中有三种配置方式,其中基于xml和annotation的方式都是和spring进行整合的,接下来的两节我们就分析一下整合的原理是啥?
我们先写一个基于Extensible XML authoring 扩展Spring XML元素的Demo,这样大家就理解XML配置的工作流程是怎样的了
# 基于XML配置的方式使用Dubbo
# Api类
public interface DemoService {

    String sayHello(String name);

}
# 客户端
dubbo-consumer.xml
<?xml version="1.0" encoding="UTF-8"?>
<!--
  Licensed to the Apache Software Foundation (ASF) under one or more
  contributor license agreements.  See the NOTICE file distributed with
  this work for additional information regarding copyright ownership.
  The ASF licenses this file to You under the Apache License, Version 2.0
  (the "License"); you may not use this file except in compliance with
  the License.  You may obtain a copy of the License at

      http://www.apache.org/licenses/LICENSE-2.0

  Unless required by applicable law or agreed to in writing, software
  distributed under the License is distributed on an "AS IS" BASIS,
  WITHOUT WARRANTIES OR CONDITIONS OF ANY KIND, either express or implied.
  See the License for the specific language governing permissions and
  limitations under the License.
  -->
<beans xmlns:xsi="http://www.w3.org/2001/XMLSchema-instance"
       xmlns:dubbo="http://dubbo.apache.org/schema/dubbo"
       xmlns="http://www.springframework.org/schema/beans"
       xsi:schemaLocation="http://www.springframework.org/schema/beans http://www.springframework.org/schema/beans/spring-beans-4.3.xsd
       http://dubbo.apache.org/schema/dubbo http://dubbo.apache.org/schema/dubbo/dubbo.xsd">

    <dubbo:application name="demo-consumer"/>

    <dubbo:registry address="zookeeper://myhost:2181"/>

    <!-- generate proxy for the remote service, then demoService can be used in the same way as the
    local regular interface -->
    <dubbo:reference id="demoService" check="false" init="true" interface="org.apache.dubbo.demo.DemoService"/>

</beans>
public class ConsumerApplication {

    public static void main(String[] args) throws Exception {
        ClassPathXmlApplicationContext context = new ClassPathXmlApplicationContext("spring/dubbo-consumer.xml");
        context.start();
        DemoService demoService = context.getBean("demoService", DemoService.class);
        String hello = demoService.sayHello("world");
        // result: Hello world, response from provider: 127.0.0.1:20880
        System.out.println("result: " + hello);
        System.in.read();
    }
}
# 服务端
dubbo-provider.xml
<?xml version="1.0" encoding="UTF-8"?>
<!--
  Licensed to the Apache Software Foundation (ASF) under one or more
  contributor license agreements.  See the NOTICE file distributed with
  this work for additional information regarding copyright ownership.
  The ASF licenses this file to You under the Apache License, Version 2.0
  (the "License"); you may not use this file except in compliance with
  the License.  You may obtain a copy of the License at

      http://www.apache.org/licenses/LICENSE-2.0

  Unless required by applicable law or agreed to in writing, software
  distributed under the License is distributed on an "AS IS" BASIS,
  WITHOUT WARRANTIES OR CONDITIONS OF ANY KIND, either express or implied.
  See the License for the specific language governing permissions and
  limitations under the License.
  -->
<beans xmlns:xsi="http://www.w3.org/2001/XMLSchema-instance"
       xmlns:dubbo="http://dubbo.apache.org/schema/dubbo"
       xmlns="http://www.springframework.org/schema/beans"
       xsi:schemaLocation="http://www.springframework.org/schema/beans http://www.springframework.org/schema/beans/spring-beans-4.3.xsd
       http://dubbo.apache.org/schema/dubbo http://dubbo.apache.org/schema/dubbo/dubbo.xsd">

    <!-- provider's application name, used for tracing dependency relationship -->
    <dubbo:application name="demo-provider"/>

    <dubbo:registry address="zookeeper://myhost:2181" />

    <!-- use dubbo protocol to export service on port 20880 -->
    <dubbo:protocol name="dubbo"/>

    <!-- service implementation, as same as regular local bean -->
    <bean id="demoService" class="org.apache.dubbo.demo.provider.DemoServiceImpl"/>

    <!-- declare the service interface to be exported -->
    <dubbo:service interface="org.apache.dubbo.demo.DemoService" ref="demoService"/>

</beans>
public class ProviderApplication {

    public static void main(String[] args) throws Exception {
        ClassPathXmlApplicationContext context = new ClassPathXmlApplicationContext("spring/dubbo-provider.xml");
        context.start();
        System.in.read();
    }
}
# XML配置原理解析
基于Extensible XML authoring 扩展Spring XML元素的步骤如下
- 编写XML Schema文件,定义XML结构
- 自定义NamespaceHandler实现
- 自定义BeanDefinitionParser,将XML解析为BeanDefinition
- 注册到Spring容器
项目结构如下 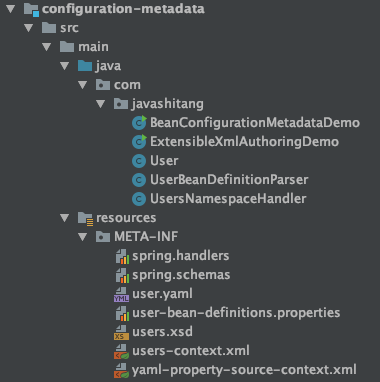
# 编写XML Schema文件
@Data
@ToString
public class User {

    private Long id;
    private String name;

}
users.xsd
<?xml version="1.0" encoding="UTF-8" standalone="no"?>
<xsd:schema xmlns="http://www.javashitang.com/schema/users"
            xmlns:xsd="http://www.w3.org/2001/XMLSchema"
            targetNamespace="http://www.javashitang.com/schema/users">

    <xsd:import namespace="http://www.w3.org/XML/1998/namespace"/>

    <!-- 定义 User 类型(复杂类型) -->
    <xsd:complexType name="User">
        <xsd:attribute name="id" type="xsd:long" use="required"/>
        <xsd:attribute name="name" type="xsd:string" use="required"/>
    </xsd:complexType>


    <!-- 定义 user 元素 -->
    <xsd:element name="user" type="User"/>
</xsd:schema>
# 自定义NamespaceHandler实现
public class UsersNamespaceHandler extends NamespaceHandlerSupport {

    @Override
    public void init() {
        registerBeanDefinitionParser("user", new UserBeanDefinitionParser());
    }
}
# 自定义BeanDefinitionParser
public class UserBeanDefinitionParser extends AbstractSingleBeanDefinitionParser {

    @Override
    protected Class<?> getBeanClass(Element element) {
        return User.class;
    }

    @Override
    protected void doParse(Element element, ParserContext parserContext, BeanDefinitionBuilder builder) {
        setPropertyValue("id", element, builder);
        setPropertyValue("name", element, builder);
    }

    private void setPropertyValue(String attributeName, Element element, BeanDefinitionBuilder builder) {
        String attributeValue = element.getAttribute(attributeName);
        if (StringUtils.hasText(attributeValue)) {
            builder.addPropertyValue(attributeName, attributeValue);

        }
    }
}
# 注册到Spring容器
spring.handlers
## 定义 namespace 与 NamespaceHandler 的映射
http\://www.javashitang.com/schema/users=com.javashitang.UsersNamespaceHandler
spring.schemas
http\://www.javashitang.com/schema/users.xsd=META-INF/users.xsd
# 测试
users-context.xml
<?xml version="1.0" encoding="UTF-8"?>
<beans xmlns="http://www.springframework.org/schema/beans"
        xmlns:users="http://www.javashitang.com/schema/users"
        xmlns:xsi="http://www.w3.org/2001/XMLSchema-instance"
        xsi:schemaLocation="http://www.springframework.org/schema/beans
        https://www.springframework.org/schema/beans/spring-beans.xsd
        http://www.javashitang.com/schema/users
        http://www.javashitang.com/schema/users.xsd">

    <users:user id="1" name="小识"/>

</beans>
public class ExtensibleXmlAuthoringDemo {

    public static void main(String[] args) {
        ClassPathXmlApplicationContext context = new ClassPathXmlApplicationContext("META-INF/users-context.xml");
        context.refresh();
        // User(id=1, name=小识)
        System.out.println(context.getBean(User.class));
    }
}
大功告成,通过我们自定义的标签将对象注入到容器中
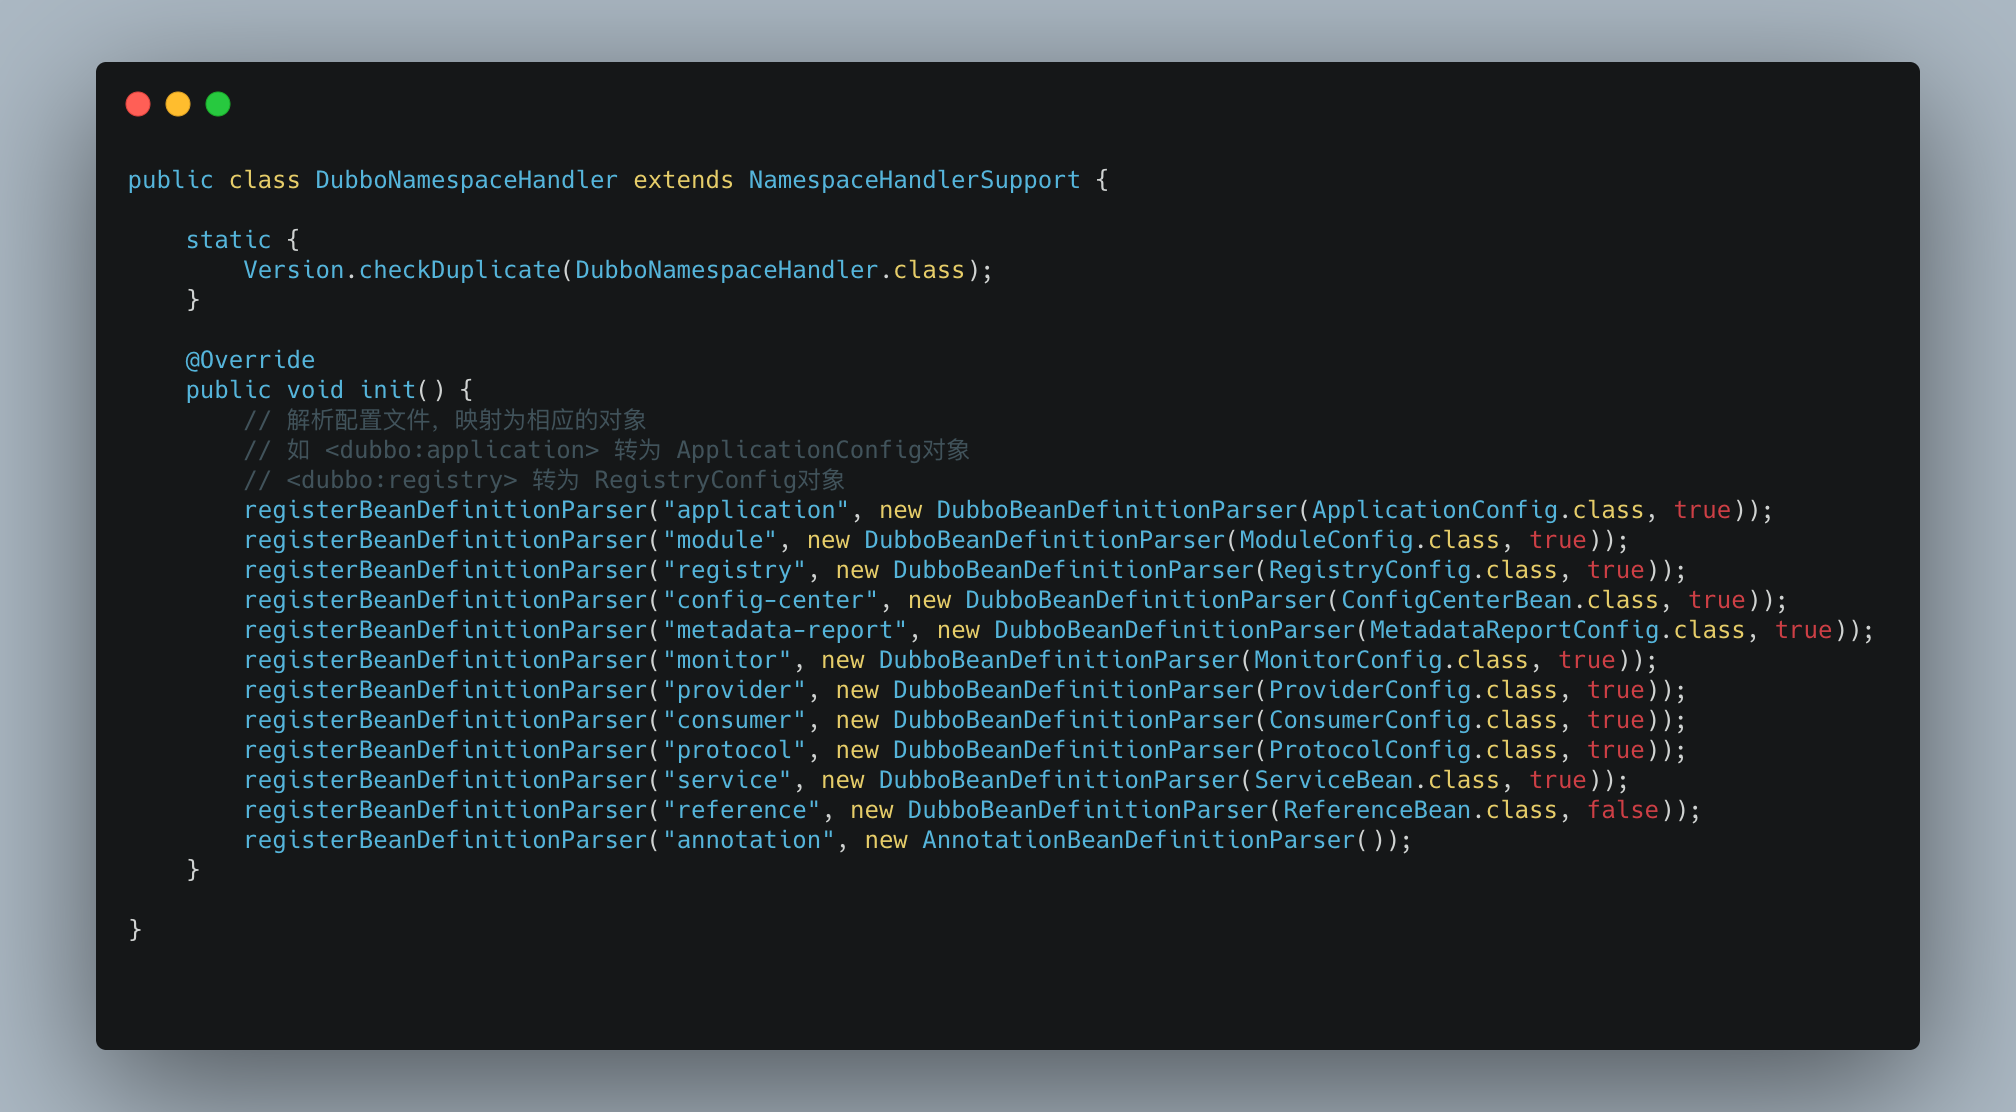
其实Dubbo源码也是通过这种方式将我们配置的信息注入到spring容器中的
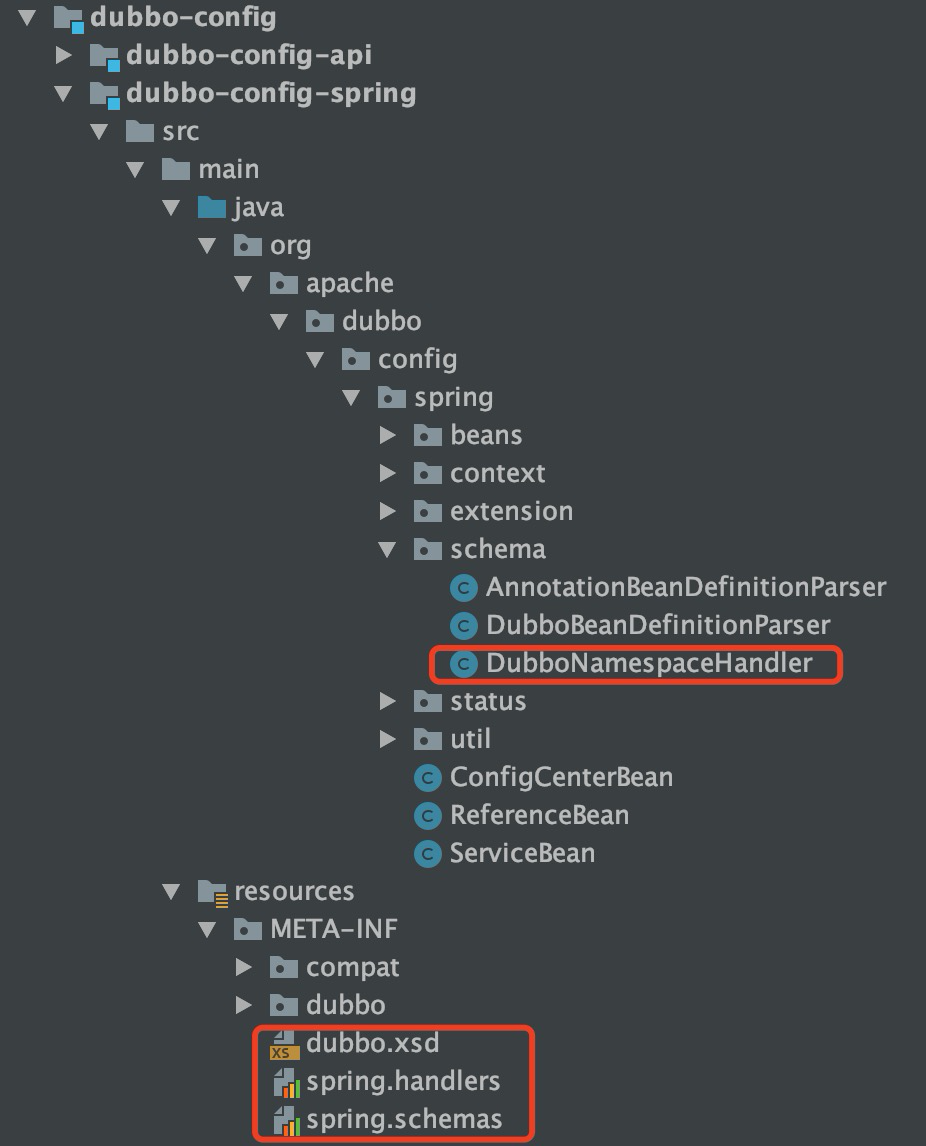 DubboNamespaceHandler将不同的配置解析为为对应的配置类,配置和对应类的关系从这里看的很清楚